How to Make a Great Sewing Box/Travel Box

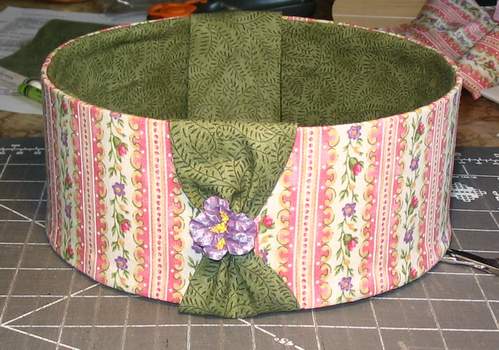
This box is shown with a wide, short strap. You will have the choice
to make this strap, or a longer, thin strap.
Supplies
Fabric: |
Color Key: |
Let's Get Started!
Step One
From the Color #2, cut your strap and set aside for further
use.
On the wrong side of your fusible web, trace two lids and two box bottoms. Label these--B for bottom, T for top. If you aren't sure which side of the fusible web is the 'wrong' side, read the instructions that come with it. It will tell you.
Cut out the fusible web circles you have just drawn, with an extra 1/4" seam allowance outside the line. The extra seam does not have to be perfect or neat. Using your fusible web instructions, fuse these pieces to the
fabrics as shown below. Inner Lid Top--Fabric #2
We use the fusible web on this step to give the lid and box a lovely, smooth finish.
|
Tip: Use the damp rag frequently to wipe excess glue from your fingers.
Step Two
Take one outer top and one outer bottom, and snip in about 1/4" (to your drawn line) half an inch apart all the way around. Remove the paper.
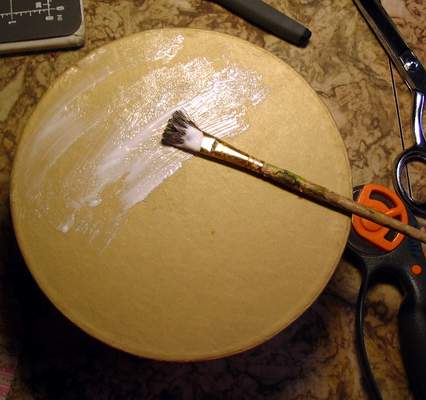
With a wide paintbrush, spread the Tacky Glue evenly across the outer top of the lid. Glue the lid piece onto the lid, pressing carefully. You don't want to make the glue too thick, as it could bleed through. You can use the damp rag to smooth out any bubbles, if needed.
Repeat this step for the box bottom. Do NOT glue in the inner top or bottom at this time! You will notice that the snipped parts overhang
the box. These will be glued over onto the sides. Spread the glue onto
the box and then press your snipped edges down.
Use the damp rag to wipe fingers after this step! If there is glue on your hands, it can spread to the fabric. |
Step Three
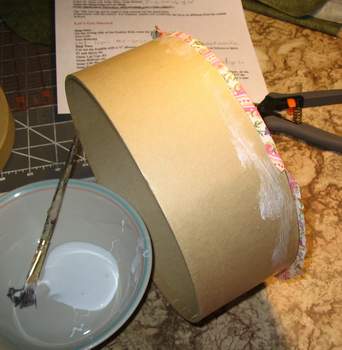
Set the bottom aside for now. Pick up the lid. Measure the depth of your inner lid, add 1/2 inch, and write down that measurement. Measure around the outside of the lid. Write down that measurement. This is the length and width of the inner edge. Cut it out from fabric #2. On both long sides of this strip, snip in about 1/4" about every 2". Don't stress on getting this perfectly even, as the glue will keep small mistakes hidden. Spread glue evenly on the inside of the lid rim first. Press the strip into this area, making sure to keep about 1/4" of it on the inner lid and 1/4" of it to press over to the outside of the lid. Confused? Check the picture below, which shows a partially glued in strip. (Your inner lid circle will cover the raw edges of this part.) You may need to trim off a small portion of your strip if it is way too long. When you get back to the beginning of the strip, fold your short edge under 1/4" and glue down firmly. This will give you a finished edge. Spread glue over the outside edge top, and press the 1/4" overhang down evenly.
Take the 2nd lid top created in Step One. WITHOUT glue, place it into the inner lid. This will almost always need to be trimmed down to fit exactly. Once you have trimmed it to fit, remove the paper, spread glue on the inner lid top, and glue this in place. Use the damp rag to wipe fingers after this step! |
Tip: when you purchase your box (usually available for under $2.00!) try to choose one with a loose-fitting lid.
Step Four
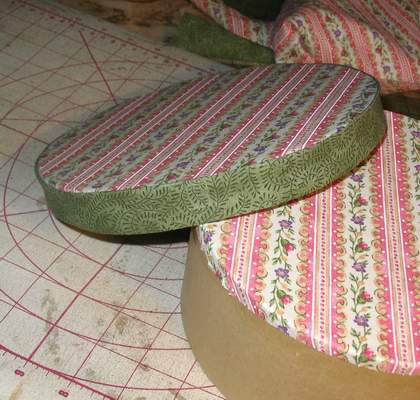
Still working with the lid, we will now add the outer edge. So far, your lid should have the top, inside top, and inside edge covered with fabric. Measure around the outer rim of the lid and add 1/2". Write down this measurement. Measure the height of the lid rim and add 1/2". Write down this measurement. This is the length and width of the strip to cut from fabric #2 (or you could always choose a third color to go here!) Take this strip, and press in 1/4" down both long sides. This has to fit around the box lid without going onto the top or onto the inside, so you may wish to hold it up to the box as you go, to make sure you are accurate as possible.
Spread glue on the outer edge of the lid rim, and carefully glue this strip in place. When you get to the end of the strip, fold over 1/4" as before and glue down securely.
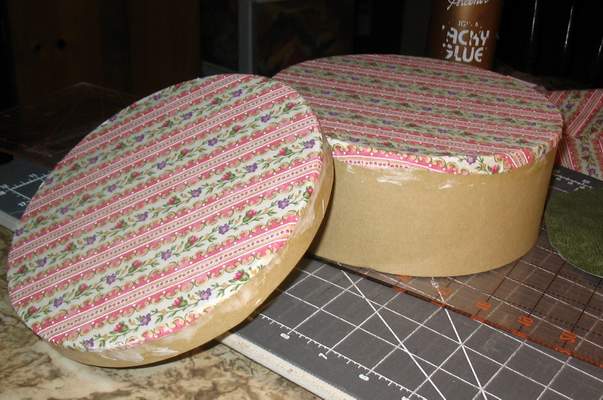
Your lid is now finished. Set it aside to dry. |
Step Five
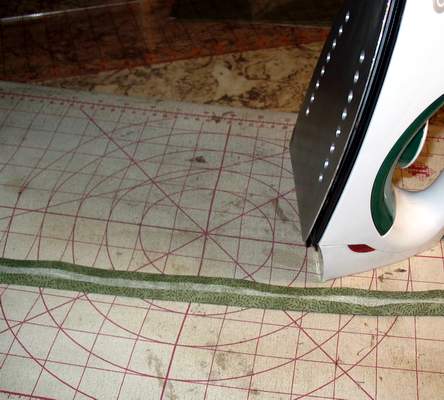
We will now add the fabric to the outside of the box. Measure around the outside of the box and add 1/2". Write this measurement down. Measure the height and add 1/2". Cut this from Fabric #1. Using a hot iron, press 1/2" down ONE long side. Snip 1/4" in, about 2" apart, on the other long side. Spread glue on the outer sides of the box and about 1/4" down the inner sides. Glue your fabric in place, with the ironed edge at the bottom of the box and the snipped edge at the top. Once the sides are glued in place, press carefully with a damp rag. Press the snipped edges into the inside. When you glue this piece on, you will fold over the end 1/4" and glue firmly in place just like you did with the lid.
|
Tip: in Steps Four and Six, you can use regular
sewing thread and tack down the edges if you want to.
I've never done this and mine stay together just fine--but some people like
a really finished edge.
Step Six
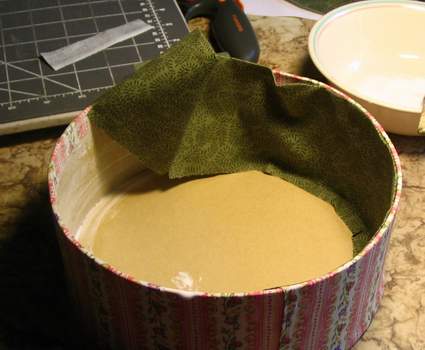
We will now add the fabric to the inside sides, using fabric #2. Measure around the outside of the box and add 1/2". Write this measurement down. Measure the height and add 1/2". Cut this from Fabric #2. Using a hot iron, press 1/2" down ONE long side. Snip in 1/4" about 2" apart on the other long side. Spread glue on the inner sides and about 1/4" into the bottom of the box. Glue your fabric in place, with the ironed edge at the top of the box and the snipped edge at the bottom. Once the sides are glued in place, press carefully with a damp rag. Press the snipped edges into the bottom of the box. When you glue this piece on, you will fold over the end 1/4" and glue firmly in place just like you did with the lid.
|
Step Seven
Almost done gluing! We are now going to add inner box bottom. As in a previous step, you will not add any glue until you have fitted and trimmed the inner box bottom circle. Once that fits nicely, remove the paper and glue into the bottom of your box.
|
Step Eight
Set your box aside to dry. Take the sashing/strapping pieces cut out in Step One. Sew them end to end to create a long strip. Fold in half lengthwise, and sew up the long side, leaving 1" open in the very middle of the strap (for turning right side out). Do NOT sew the ends shut yet.
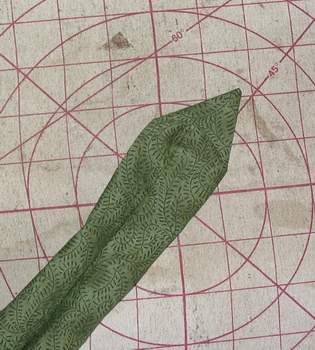
Lay the strap down, seam side facing you. Measure down 1" on the seam side, mark it, and then draw a line from that mark to the top of the strap. Sew this line. Repeat on the other end. Turn the strap right side out. This step will create a point.
Press this strap with the sewn seam in the center. When you get to the points, fold in the extra fabric under the point, and tack it down if desired. (Ok, I don't usually bother to tack it down, as it stays in place from the pressing!) You can also tack the turning opening shut, but as it is at the inside bottom and never shows, I don't.
|
Step Nine
TIP: Put the lid on the box before sewing to make sure you have enough room for your button placement!
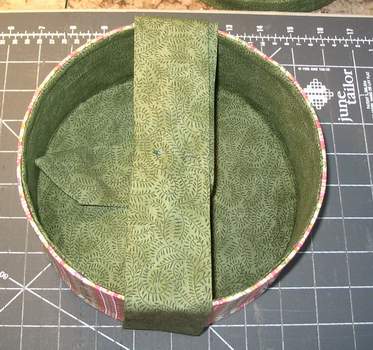
Fold the strap in half and find the center. Place the box bottom over this, centering the bottom of the box with the center of the strap. Fold the strap edges up and over the top, and pin together. This will help you when you sew on the buttons.
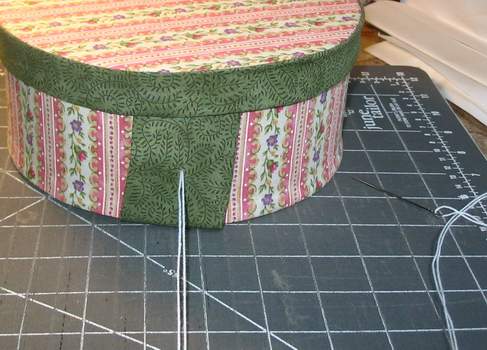
Thread the darning needle with the heavy thread. I used white thread so you could see it better, but you would want to use matching thread if possible. You will need the hemostat or needlenose pliers for this step, to help you grasp and pull the needle through the box. It's not hard to do, but the hemostat makes it much easier. Start by hiding the knot between the strap and the box (in other words, go through the strap from back to front first). Tack the strap to the box with two-three stitches.
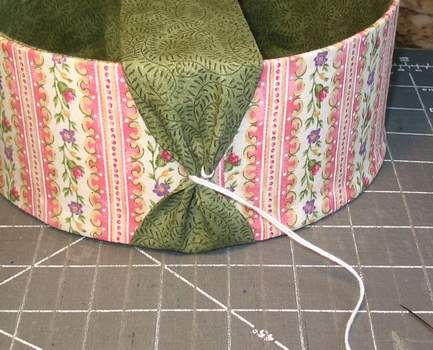
Next, bring the thread to the outside of the strap/box, and wrap it around the strap a few times to gather the strap in. Go back through the box once, and bring the thread to the outside again to add your button.
Sew your button firmly in place. Repeat for the other side. |
Tip: You can sew a small button to the inside
at the same time, just for fun! It can help hide stitches,
or provide a place for you to button on a pin cushion or to anchor a travel
doll in place.
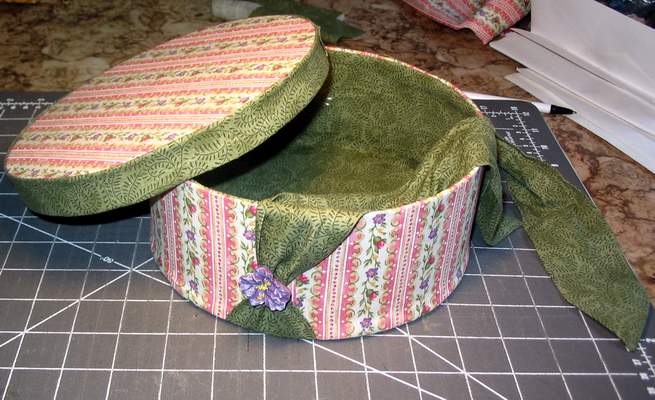
You are finished! You can send
me a picture of your finished box,
and I will add it to our Student's Pages.


