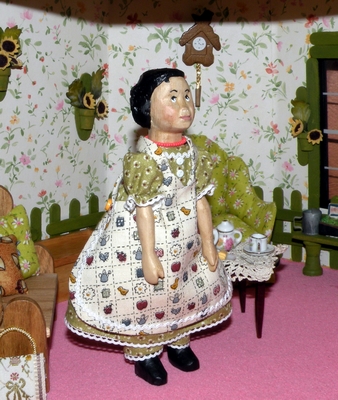
Make a Pinny and Grandma's Apron for Hitty
This pinny will fit dolls from 5" to 8".

This serviceable Grandma's Apron is attractive and useful.
Hitty Petal's Pinny is sassy and cute!
Supplies
Pencil
Needle and Thread
Sewing Machine
Iron
Magic Sizing or Spray Starch
Scissors
Grandma's
Apron
8" x 16" fabric
2 buttons
Trim
Fabric Glue
Hitty
Petal's Pinny
8" x 10" for Pinny
1" x 13" for Tie strap
Get Grandma's Apron Template Here
Get Hitty Petal's Pinny Template Here

Fold the fabric right sides together, and trace
the template onto the fabric.
This is your sewing line--do NOT cut this out yet.
Tip: Use a pencil or a disappearing ink quilting
pen.
A real pen can leave marks in your seams.

Sew around on the sewing line, leaving the
space open indicated on the template.

Now you can cut this out with a 1/8th inch seam allowance.
Clip inner curves.

Turn right side out and press. Whip stitch the open seam shut.
Tip: I have found a hemostat
the easiest way to turn items right side out.
Make sure to 'poke' the straps out. DO NOT
use a pencil, scissors, or any other sharp object to
poke out the edges. They will make a hole.

Lay a thin bead of glue where you want the trim.
Yes, you can sew the trim down, but gluing makes a
much neater trim.

Carefully lay your trim on the glue and
press down. I like a wet cloth handy to wipe
my fingers as I do this step.
Allow to dry before finishing.

Fold one strap over to the other side and sew in
place, attaching the button at the same time.
Check template for button position.
Repeat for the other side.
Now you are done! Isn't that easy?

I think this would look cute with a pocket!
Hitty Petal's Apron
Fold the fabric right sides together, and
trace
the template onto the fabric, as above.
This is your sewing line--do NOT cut this out yet.
Sew around on the sewing line, leaving the
space open indicated by the red dots on the template.
Cut this out with a 1/8th inch seam allowance.
Clip inner curves and corners.
Turn right side out and press. Whip stitch the open seam shut.
Tie
Fold in half lengthwise, right sides together.
Sew across end, turn, sew up to middle, leave *about* 1/2" open for
turning,
sew to other end, and then across end.
Turn right side out and press firmly.
Pin across apron front, either eyeballing it in or using the Strap Placement red box on template.
Sew Tie on by starting about 2" in
from either end. Sew all away around the tie,
ending off when you reach where you began.
DONE!
| Download a free hit counter here. |